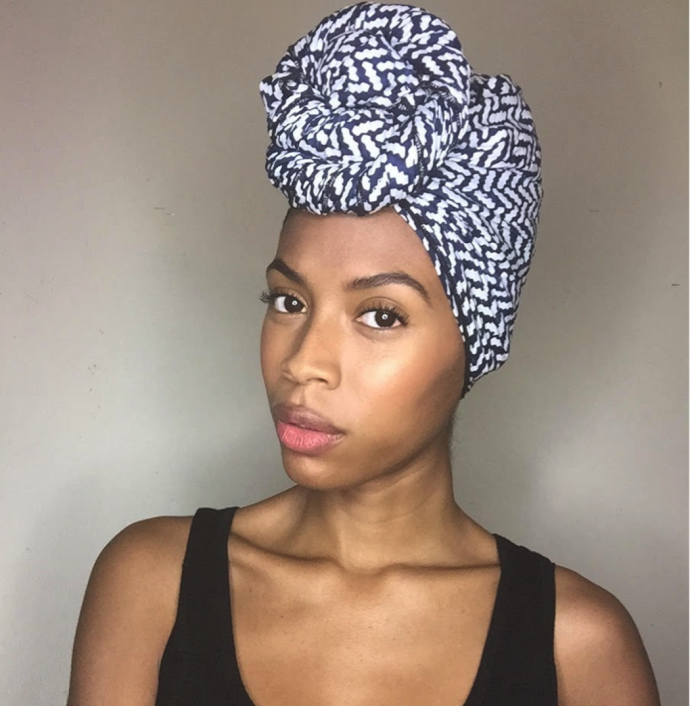
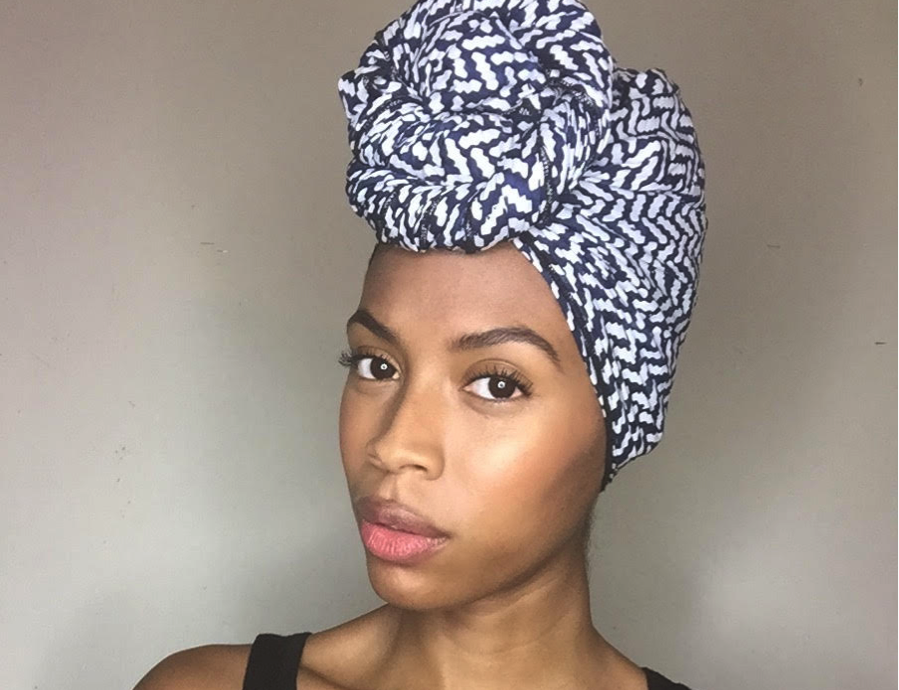
As summer is coming to an end, get ready to put away your bikinis and bring out the long sleeves and chunky sweaters. When the leaves begin to fall and the air gets crisp, get ready to ditch that wash and go for a protective style. One of my favorite looks to rock in the Fall season is a headwrap. It’s a protective style in the sense that none of my hair is exposed to the elements, yet unlike your typical protective style (braids, twists, crochet, extensions) it can conveniently be undone in a matter of seconds. There are so many ways to wear a headwrap. Here are my go-to easy three using my favorite wrap from The Wrap Life.
THE BOW
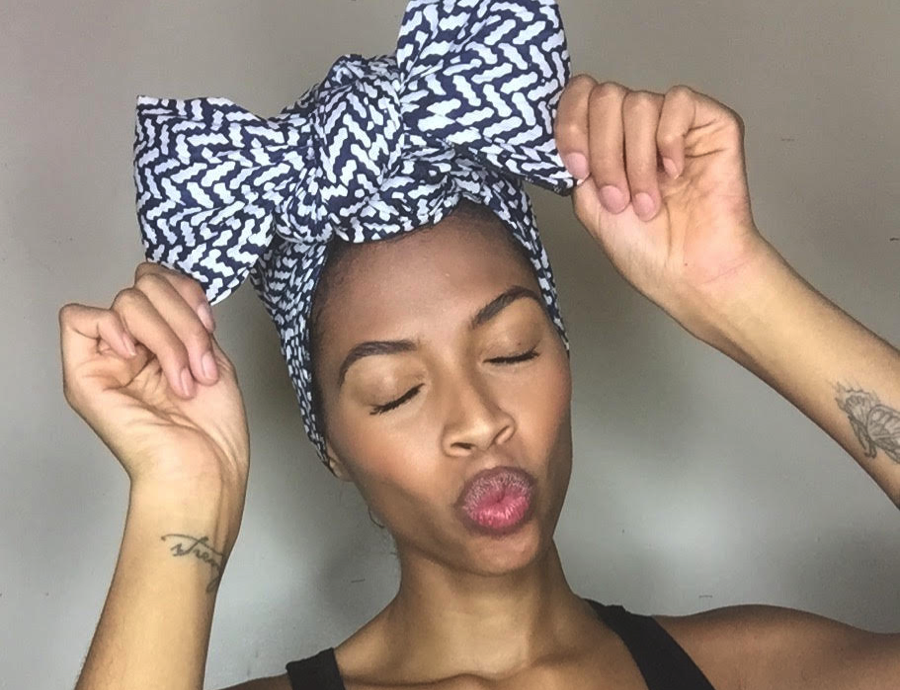
Step 1: Start with your hair in a topknot (for shorter hair) or slicked back (for longer hair). Place the headwrap at the nape of your neck, and covering your ears.
Step 2: Bring the ends toward the front and tie the front into a knot at the center.
Step 3: Tie a bow like you would a shoelace, and tuck the loose ends into the flaps of the bow.
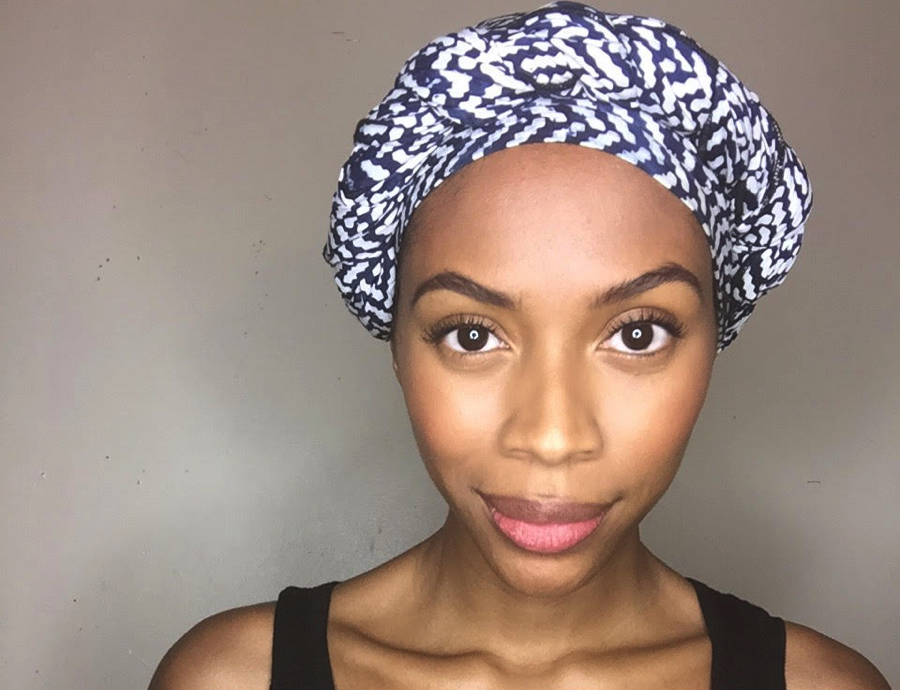
THE BUN
Step 1: Start with your hair in a topknot positioned at the front of your crown (pineapple style). Place the headwrap at the nape of your neck and covering your ears.
Step 2: Bring the ends toward the front and tie it in a knot at the center.
Step 3: Twist the loose ends together creating a spiral.
Step 4: Twist the spiral around the knot your created to create a bun.
THE TWISTED HEADBAND
Step 1: Start with your hair slicked back or in cornrows (for longer hair). Forbest results, your hair should be as flat as possible underneath. Place the headwrap at the front of your head and pull the ends toward the back, ensuring all hair is covered.
Step 2: Bring the ends together and tie together once. (Do not create a knot)
Step 3: Twist the loose ends together (two-strand twist motion) to create one twist.
Step 4: Pull the twist to the front from one side to the other and tuck in the end under the wrap to secure.
To protect your hair against breakage under the cotton wrap, always tie a silk or satin scarf underneath. In just a few easy steps you- and your curls, are ready to take on the Fall season.
SHOP THE PRODUCTS